Friday, July 30, 2021

Editing Punches with the App

Hello everyone, in this post we are going to talk about a feature that employees can use in case they need to make time adjustments to their punches. Of course, this is an optional feature and should only be enabled if your organization wants employees to have this access.  If needed, you can enable it only for specific users, which is useful where some employees would be better off having a manager handling their edits..

You can enable this for the whole company by going to the Administration tab, then Preferences and ticking the "Enable Event Edit on Phone" checkbox, then clicking on "Save" at the bottom of the screen:

Click on image to enlarge


To enable it individually, you can go inside a user's profile from within the Field Workers tab and check "Enable Device Edit", then clicking on "Update":


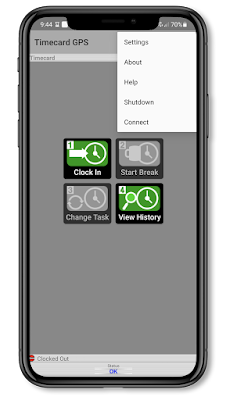
Now, starting from the Main Screen, we tap the icon #4 "View History". We will be shown the punches registered from the moment we installed the application. Then, we select "Edit" to continue:


In this example, we are going to edit the start time, so we tap on the "Edit" button that belongs to the start time and a clock will be opened to allow you to select the correct time. This may vary depending on the device model that you have:


We want to move the time to start at 6:00 AM, then we type a reason for the change and hit "Save":


The device will take us back to the History screen where after a couple seconds, the time will be updated right in front of our eyes!


Of course, any changes that are performed this way will be shown in the "TimeCard Audit Report":
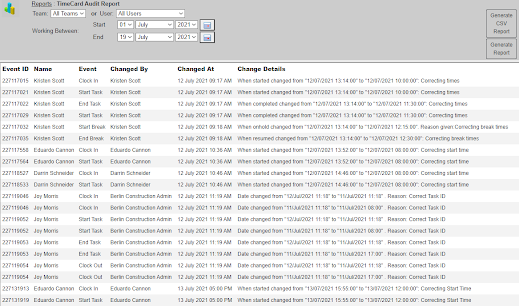
Click on the image to enlarge

There are other things that can be done in the "View History" section, but we'll be covering them in a future post, so stay tuned!


--Econz Team

Friday, July 16, 2021

Creating a PIN for Timesheet Signoff

In this post we will show you a way to create a PIN that you can use to access the Timesheet Signoff within the Timecard GPS application. This is very useful for companies that handle complex passwords for user profiles or have managers in charge of setting up the devices instead of the employees. This feature makes things easier so that field workers can set their own, easy to remember PIN.

For this, start at the Home Screen and tap on the gear icon on the top right to access the Settings:


Once there, tap on the three-dots icon on the top right to set additional options and choose "Manage PIN":


You will be asked to verify your password to access the next section, so either get assistance from the manager in charge, or if you know your password, enter it and tap on "VERIFY":


Next, tap the "SET PIN" button:


And finally, create your own PIN and tap on SET PIN to finish.


Next time that you are signing your timesheets, you will be able to enter either your profile password or PIN as desired, whichever one makes more sense to you!

We hope you like this little time saver, let us know if you have any questions in the comments section.


--Econz Team

Friday, July 9, 2021

Appending or Replacing SmartFences using a CSV File

In a previous post, we had learned how to use a CSV file to upload a list of SmartFences, how they could be either circular or polygonal and that we could gather a list of each of the coordinates that would draw the complete shape of the irregular fence.

Today, we will see how we can use this same functionality with a new option that we included to append or replace existing SmartFences.

This is the current list of fences that we have at the moment:


If we click on the "Upload Smart Fence CSV File" button, we will be able to get to the upload screen. Here we have our file ready (called smartfences.csv), and we have selected the "Append" option, then we click on Upload:


We will get the confirmation screen to review if the SmartFences we are uploading have all the correct information:


Finally, after confirming, they will be added to the full list:


If we wish to replace the existing list with a whole new one, then we only need to click on the Replace option instead:


We will get the following message warning us that using this option will delete all the existing fences:


Then, after choosing our file and clicking on Upload, we will get the confirmation screen; if everything looks good, we can click on "Confirm":


The previous fences we had will be deleted and replaced by the new list we just uploaded:


That's all for now! In case you have any questions or comments, don't hesitate to leave us a message below.

Until next time!


--Econz Team