Hello everyone, today we are back with a new feature! Always thinking of better ways to make your life easier and help you be faster and more efficient at work, we have engineered a feature that will allow you to load tasks to individual users that haven't been added to a specific team. This is very useful because originally, if you wanted to assign specific projects to only one person, you had to create a team just for that one employee, load tasks for that person, and repeat the same process for every other staff member that needed it. While that still is pretty easy to do with our system, we enabled an even quicker method of taking care of that.
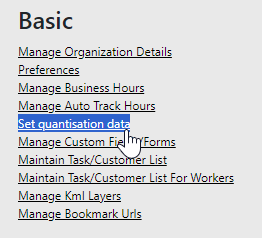
Let's see how to set it up! First, we go to the Administration tab and select "Preferences", from the "Basic" section.
Next, scroll to the bottom and tick the new "Has Field Worker Tasks" option, then click the Save button on the bottom left of the screen.
Once you go back to the main Administration section, you will notice a new entry called "Maintain Task/Customer List For Workers":
You will notice a familiar face, this section is pretty similar to the original "Maintain Task/Customer List", but instead of having a list of teams on the left column, we now have a list of Field Workers. From here, you will be able to load tasks for an employee, ideally one that is not assigned to a team, but keep in mind that if you do upload tasks for someone that belongs to a team, then these new tasks list will override the previous selection of jobs.
The beauty of this new functionality is that you don't even need to click on the names, you can use a CSV file and load the tasks and subtasks, just like you would do on multiple teams, but this time, it's on multiple employees. Open the dropdown menu and select "Load tasks/subtasks for specified employees using the Manpower CSV format".
This time, following the format from the example, we would use column A to put the employees' Device IDs, column B would have the Tasks and C, the SubTasks. same as uploading tasks to multiple teams, if you have a task with several subtasks, make sure to list all of the subtasks on column C, and to use the same task that these should go to on column B.
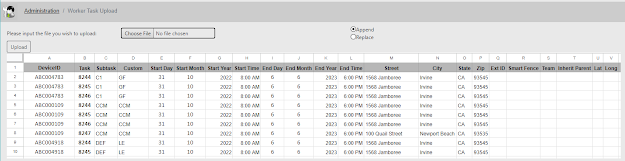 |
| Click on the image to enlarge |
The rest of the columns are optional, you can use them to set a job start and end time, address, and even smart fences if you wish so! Finally, find and select your file to upload it, append or replace the list to the existing tasks and save it. Now all of your employees can have their own individual set of tasks and subtasks!
That's all for now, stay tuned for some interesting announcements to come...!
--Econz Team