Showing posts with label timecard. Show all posts

Wednesday, September 16, 2020

Two New Forms Feature Improvements: Video Capture and Radio Button

We are excited to announce that we have been working on some improvements to the forms features given feedback from our existing customers. These enhancements include the ability to now record a 30-second Video inside the form and being able to see Radio Buttons for answers based on Yes/No questions.


Radio Buttons

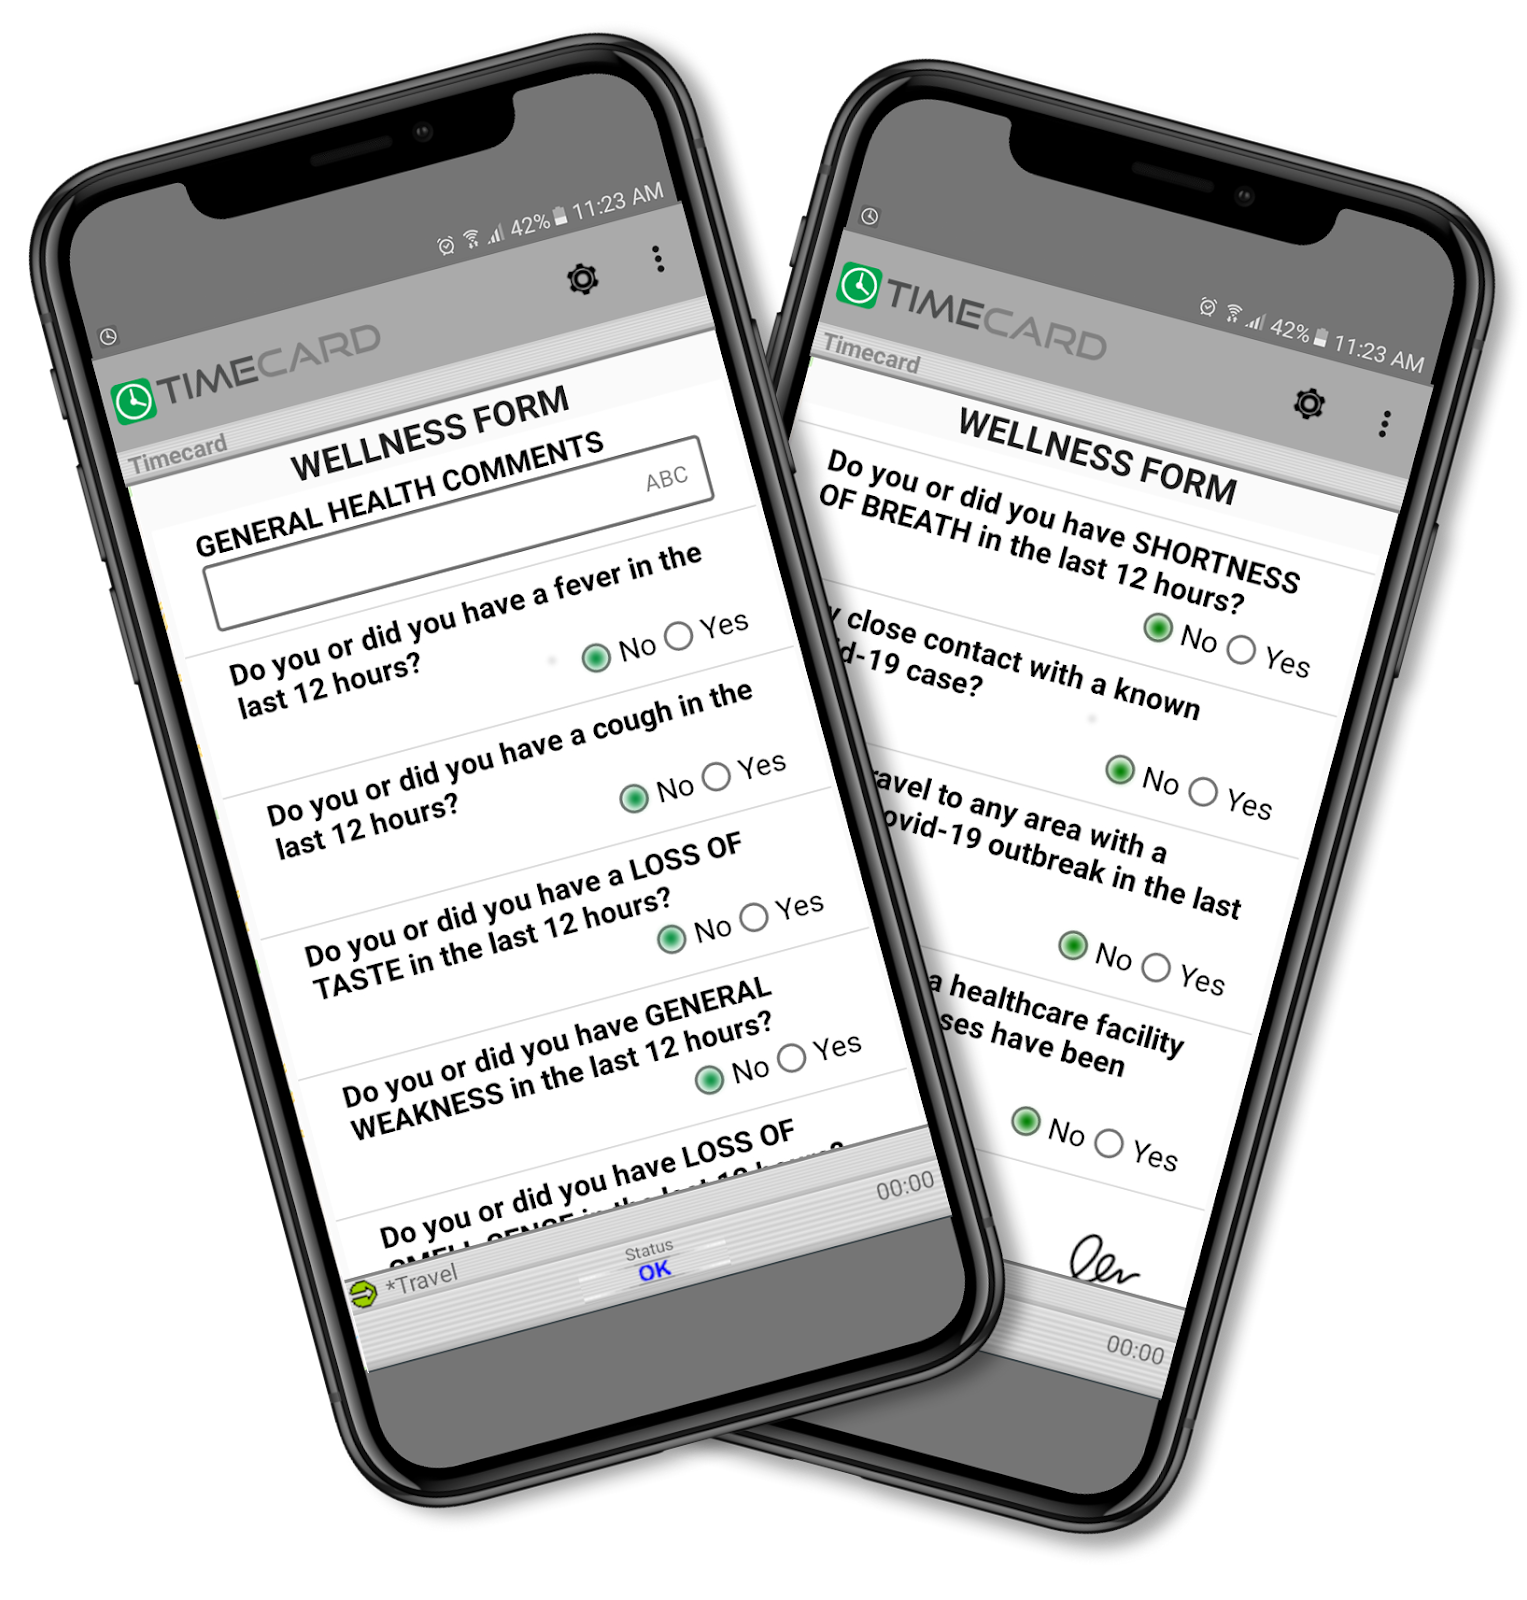
Given more and more of our customers are using our solution for Covid-19 Self-Assessment Surveys, the radio buttons from the custom fields is a new “customer favorite” as this feature allows field workers to answer Yes/No questions quickly and in a more convenient way.


Here’s an example view from the Wellness Form: 


The first step to enable this feature is to go to the Basic section in the Administration tab and selecting "Preferences". Find the option called "Render Yes/No field as radio buttons" and tick the checkbox as follows:


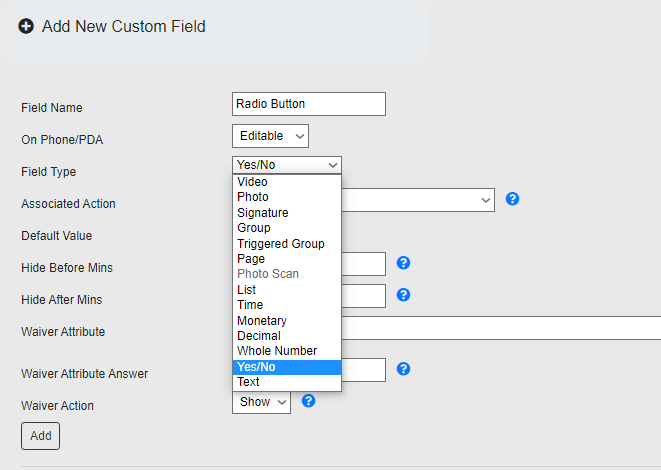
Scroll to the bottom and click on "Save" to apply the changes. Next, in the same "Basic" section, go to "Manage Custom Fields/Forms". Here make sure to select the Field Type "Yes/No" when creating the new Custom Field and click on Add. The process here is the same as always, to learn more about it, we have an article dedicated to working with Forms:


30 Seconds Video

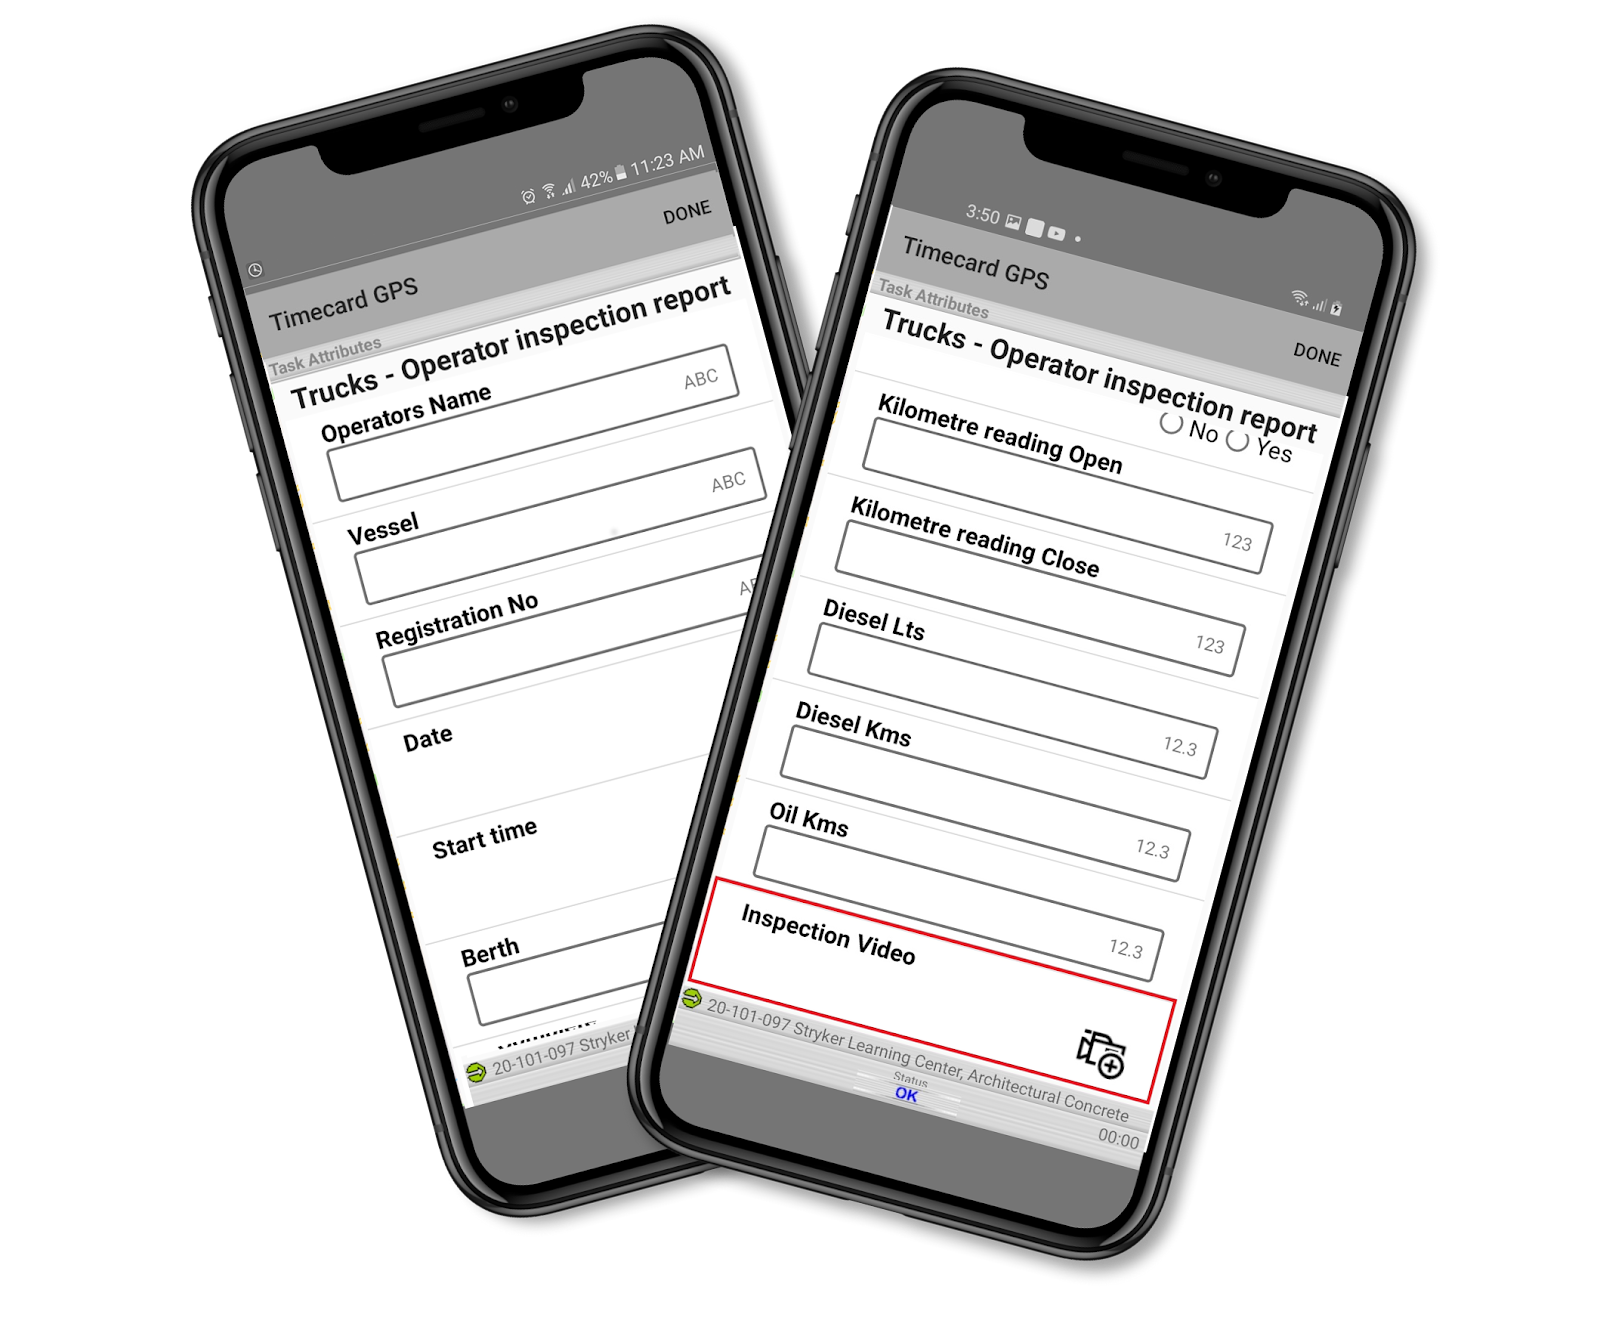
This feature gives the field user the capability to take a 30-second video inside a form to document customer visits or important things happening on the field.


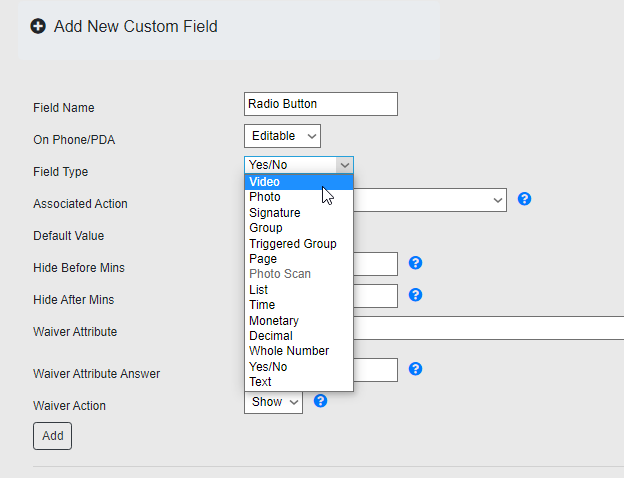
To create a Video Custom Field, the steps are the exact same as described in the previous point, that is, going to the "Manage Custom Fields/Forms" section and adding a new field in a form. In this case, make sure to select the Field Type called "Video" and click on "Add" once you are ready:
 

That's it for now! We hope you take advantage of these incredible new features, be on the lookout for new things that will be coming up.


--Econz Team 


Wednesday, February 12, 2020

New Feature: Loading Users to Checker with CSV Files

We have just introduced a new feature which will help a lot of companies to manage employees that are using Timecard Checker.

With this, you will be able to load users to a tablet and assign them a PIN number all through the web portal in a couple of simple steps, which will be a real time saver when you are dealing with long list of users that share the same device and need to be setup.

These are the steps:

1. Click on the ID of the Checker Owner device (the device ID that is used to setup the phone or tablet to enable the kiosk functionality):


2. Once inside the profile, click on "Update Checker Users":


3. On the next screen, you will find the option to upload users with a CSV file, so make sure to click on that button to continue:


4. Here is a sample of what is required, as you can see, it's pretty simple! All you need is the users' device IDs in column A, and the PIN numbers for each in column B (of course, these need to be existing users that have already been added to the system):


5. Then you will be prompted to look for the file after clicking the "Choose File" button. Once you find it, you can click on "Upload":

(Click on image to enlarge)

6. If everything is OK, you will get a confirmation screen similar to this one:

(Click on image to enlarge)

7. After this, the device can be setup (or do Menu/Connect in case you are just adding new users). Doing the setup following this guide also has the benefit that the employees will be automatically setup, so there won't be any need for each person to confirm their password and enter a PIN number. They will be ready to clock right in without any additional input!


8. Once the users are added to the tablet, you will notice that once you access the checker owner's profile again (in this case, "Warehouse Tablet #02" as seen in step 1),  the system will provide a list of all the users that were added to the tablet along with the assigned PIN numbers:

(Click on image to enlarge)

We are very happy to provide these quality of life improvements, we are very confident that this will improve your company's productivity exponentially!


--Econz Team

Wednesday, December 18, 2019

Timecard Checker: New PIN Functionality

In this blog post, we are going to cover a new feature that we have implemented to provide an alternative solution to the way Timecard Checker can be used: clocking in with PIN numbers.

This functionality will enable users to just go the the app, type their PIN number and be automatically logged in to their profiles. To set this up, you need to enable this setting within the Preferences screen in the Administration tab:


Then, the rest is done within the app itself!

When the application is setup and all the profiles are being loaded, first you need to create a PIN number for the "owner" user (the one that enables the checker features and is the one used when setting up the app initially). In this example, it's "OfficeTablet":


You can proceed setting up the users as normal:


After the users are setup, since the PIN number has been created, tap on the owner user again and verify that PIN to enter the profile. Next, open the menu with the gear icon and select "Settings":


Open the menu again and select "Checker config". Once inside that screen, you can enable the first settings according to your company setup (for more information about them, you can click here), but the one option that we need to enable to complete the proper setup is the last button "Hide user list":


When the user list is hidden, the app will now show a dial button which employees can now select to enter their PIN numbers:


After this, they can proceed as normal and clock themselves in! Notice how by using the PIN number functionality, they no longer need to search for their names from the list of users.


Leave us any question or comment below!


--Econz Team

Wednesday, October 16, 2019

Timecard Checker Enhancements available in iOS and Android

Hello everyone,

Just wanted to give you a quick update: we have just updated both iOS and Android versions of Timecard GPS and now both include the full Timecard Checker functionality including the latest enhancements we had added for Android a few weeks back.


To learn more about what Timecard Checker is, make sure to visit this link or contact us directly to learn more.

Until next time!

--Econz Team


Wednesday, December 6, 2017

New Feature: Timecard Checker

There may come the time when you need to collect timesheets and punches from a group of people but only have one device for them to share. Our new Timecard Checker feature will help you with that!

First make sure to setup one Checker user per device, this is the person that will do the initial setup and aid the crew members in setting up their profiles on the device. To do this go to the Field Workers tab and click on Add New:


Then make sure that the Device Type is set to "Timecard Checker" to enable these features:


The rest should be setup as normal:
  • Device ID: the user's phone number.
  • Name: Employee's name.
  • User Type: set it to Field Worker.
  • TimeZone: use the correct time zone for the employee.
  • Security Question and Answer can be left blank.
  • New/Confirm Password: set the password to something secure of your choosing.
Finally, click on Add New at the bottom. This is only required for the Checker user, any other users that will be added to punch in with the same device have to be added as a "Timecard" user instead of "Timecard Checker" on the Device Type field.

Next, we will cover how set this up in the application. Download the Full Version of the app and enter the Device ID and Password when you first launch it. The phone will start authenticating with the server and once it does, it will download all the information for the user's profile. You will know it's ready when you see the green thumbs up.


When you tap on your name, you will be asked to enter the password and to setup your own PIN number to be used from then on once you wish to interact with the app through your profile:


To add a new user (and all subsequent users, tap on the plus icon on the top right of the screen. Then, enter that person's Device ID and Password (make sure to check with Management or our Customer Support team if you don't have this information):


A Search textbox will appear on the top of the screen the moment you have added at least 15 users. This will help everyone find themselves without the need to scroll through the whole list. Once the profile finishes authenticating with the server, the app will request the user to enter a PIN number, too.


This process will always happen when setting up new users and this PIN number will be used every time an employee taps on their name to add punches. Once the PIN is verified, they will see the Clock In screen. Please keep in mind the following images will show how it works for users other than the Checker. The Checker user will have full access to the standard four icons (Clock-in/out, Start/End Break, Change Task, View History), all tasks and settings.

Once the employee taps on "Clock In", the Photo app will be launched for them to take a picture. This will happen for any of the punches entered through the app (Clock in and out, starting and ending breaks).


When you are ready, tap on "EXIT" to leave back to the main employee list so someone else can interact with Timecard. Use the icon #2 to start a break, and at the end of the day, tap on the icon #1 to clock out!


That's it for now! Let us know in the comments section if you have any questions or thoughts.

-Econz Team