Showing posts sorted by relevance for query custom forms. Sort by date Show all posts

Wednesday, July 19, 2017

Timecard GPS: Custom Forms

This blog post will be very useful for most customers that are looking to capture additional information in an organized, meaningful manner. Here we will discuss the usage of Custom Forms.

Custom Forms, as the name implies, are used to create and capture forms. These will be created with the existing functionality of Custom Fields. You can create the fields and organize them exactly how you need them so employees will be able to access the forms and enter all the necessary data. They can even access the same form while working on the same task and keep adding to it as needed.

To set this up, go to the Administration tab and click on "Manage Custom Fields/Forms":


Once inside, click on the "Add New" button at the top.


This is what you will see next:


Name: Here you will enter the name that the Custom Form will have. This is how it will appear to the employees.

Triggers: this section is used to determine at what point the form will be displayed or accessed.

  1. Manual: the Custom Form can be accessed at any moment while the employee is clocked in.
  2. Clock In: the employee will be prompted to fill out the Custom Form the moment he/she clocks in.
  3. Clock Out: the employee will be prompted to fill out the Custom Form the moment he/she clocks out.
On this example, we are going to add a Clock Out Custom Form, so the employee can see it at the moment he/she clocks out.


We have added the name and the "Clock Out" trigger, we are ready to click on "Save". Next, we go back to the "Manage Custom Fields/Forms" section and our newly added form will be there at the bottom of the list. Let's click on "Edit".


You will notice that there are some new options in the Details screen:


You can use the Filter section to enable the Form to be accessed only for a specific Task. Of course, this makes more sense in a Manual form that can be accessed at any time during the day, but just keep in mind that filters are a very powerful tool in case there are forms that are exclusive to a specific type of activity.

The next step is to clock on "Edit Form Fields". If you have ever worked with Custom Fields, the next screen will be familiar. If not, be on the lookout for an upcoming post that will cover Custom Fields in more detail.

We will add a couple example fields that are relevant to our company:


The setup is completed. When accessing the mobile application, keep an eye on the Menu section, you will see the option called "Forms". Here is where you can access all of the Manual Forms that were created in the Administrator Portal.

Below is a video showing how this example form will look and behave on the mobile application when the user clocks out, it also shows how to access other Manual forms that have been created.


We hope you can benefit from this wonderful feature! Let us know if you have any questions about this feature and we will gladly assist you.

--Econz Team

Wednesday, September 16, 2020

Two New Forms Feature Improvements: Video Capture and Radio Button

We are excited to announce that we have been working on some improvements to the forms features given feedback from our existing customers. These enhancements include the ability to now record a 30-second Video inside the form and being able to see Radio Buttons for answers based on Yes/No questions.


Radio Buttons

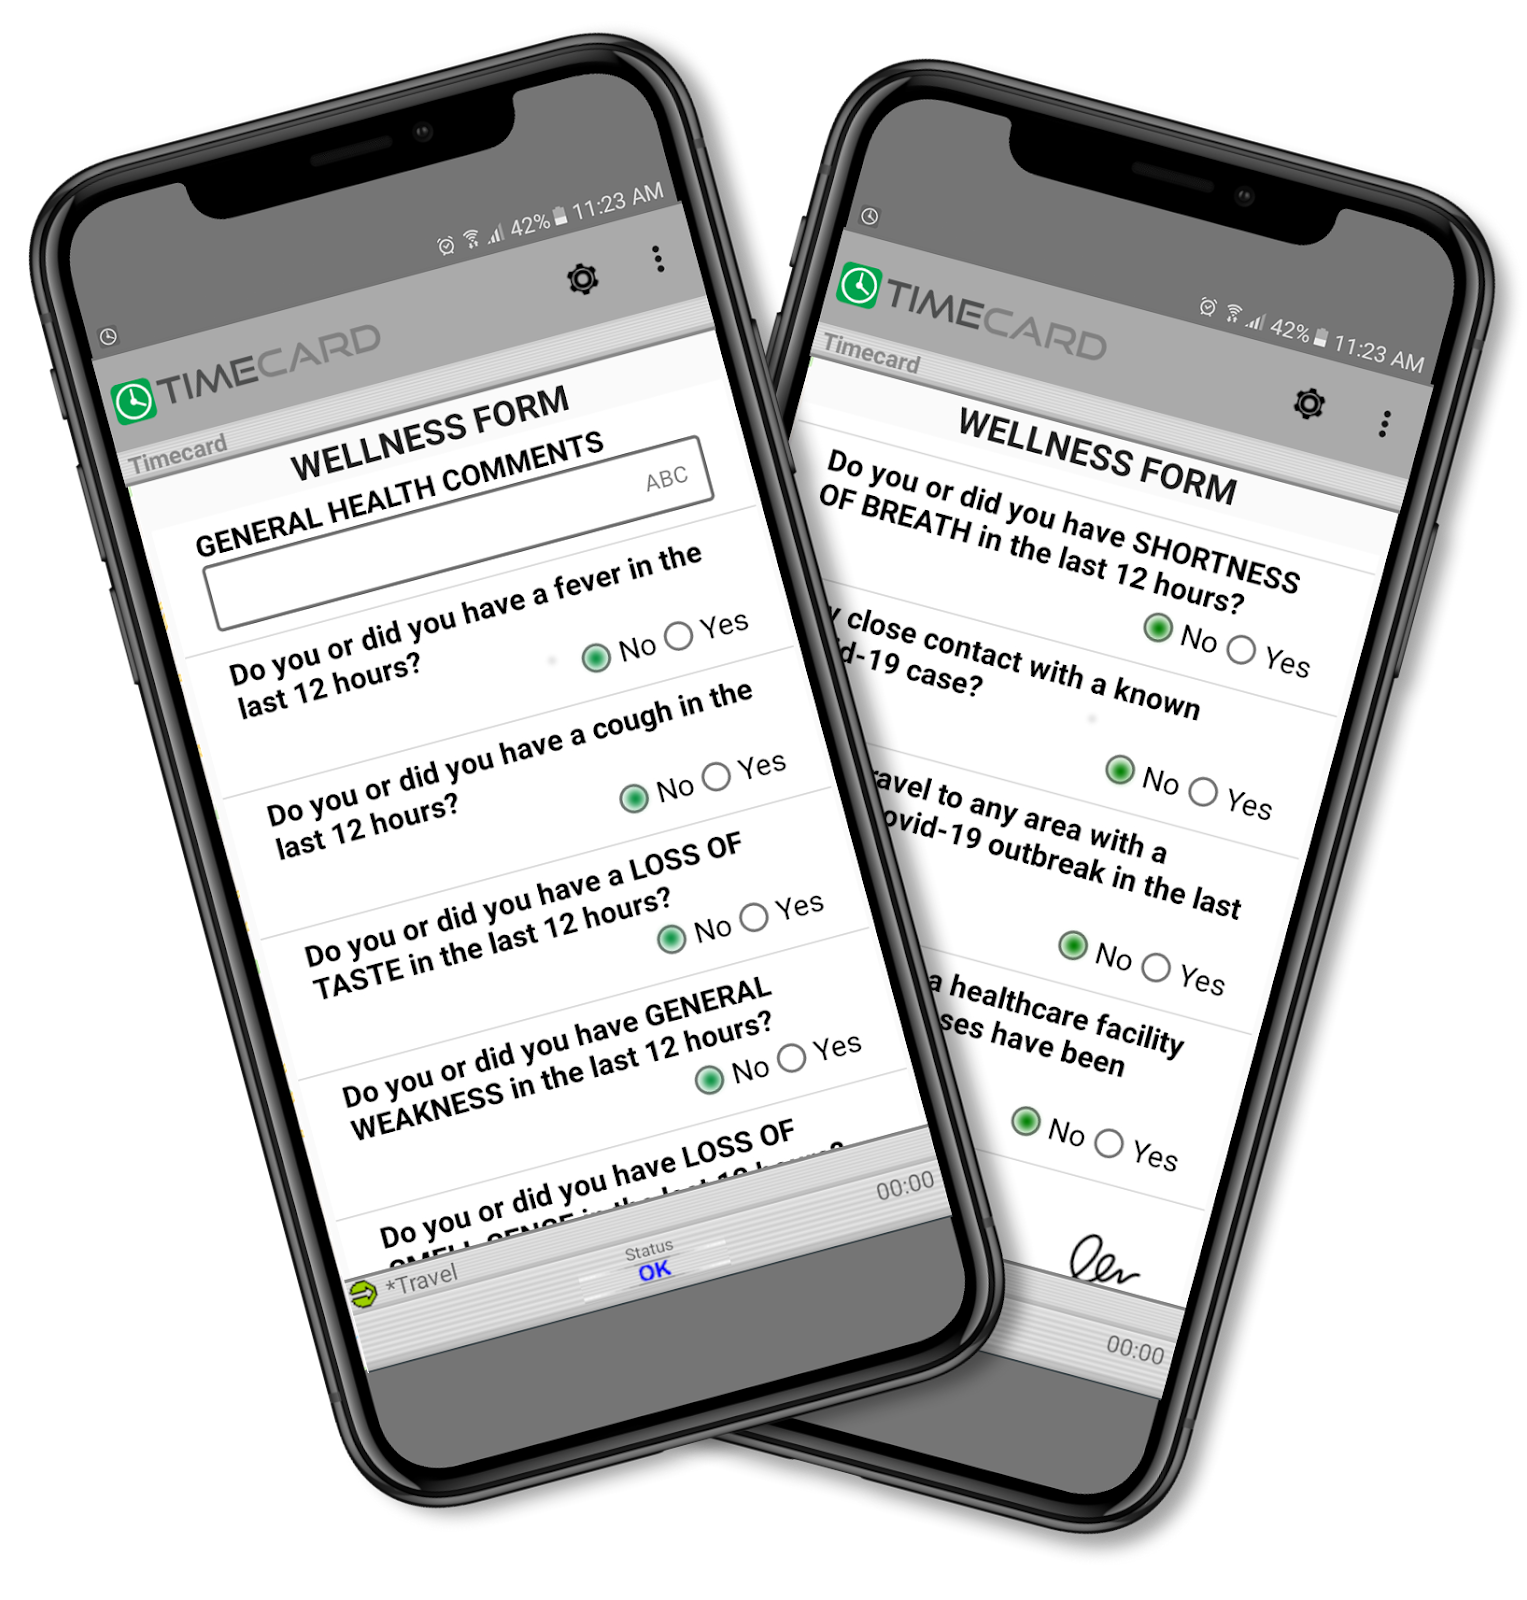
Given more and more of our customers are using our solution for Covid-19 Self-Assessment Surveys, the radio buttons from the custom fields is a new “customer favorite” as this feature allows field workers to answer Yes/No questions quickly and in a more convenient way.


Here’s an example view from the Wellness Form: 


The first step to enable this feature is to go to the Basic section in the Administration tab and selecting "Preferences". Find the option called "Render Yes/No field as radio buttons" and tick the checkbox as follows:


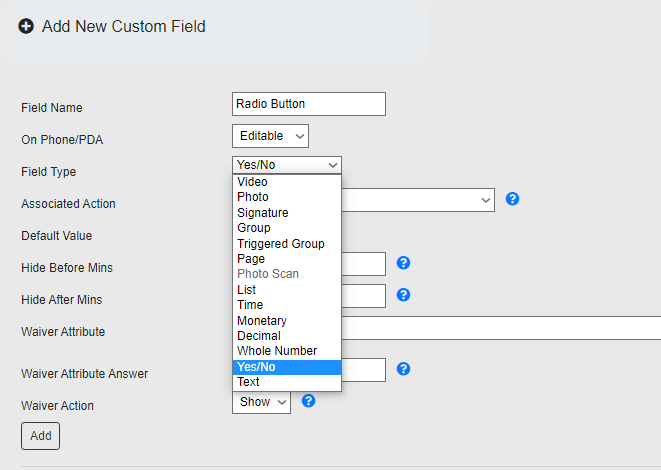
Scroll to the bottom and click on "Save" to apply the changes. Next, in the same "Basic" section, go to "Manage Custom Fields/Forms". Here make sure to select the Field Type "Yes/No" when creating the new Custom Field and click on Add. The process here is the same as always, to learn more about it, we have an article dedicated to working with Forms:


30 Seconds Video

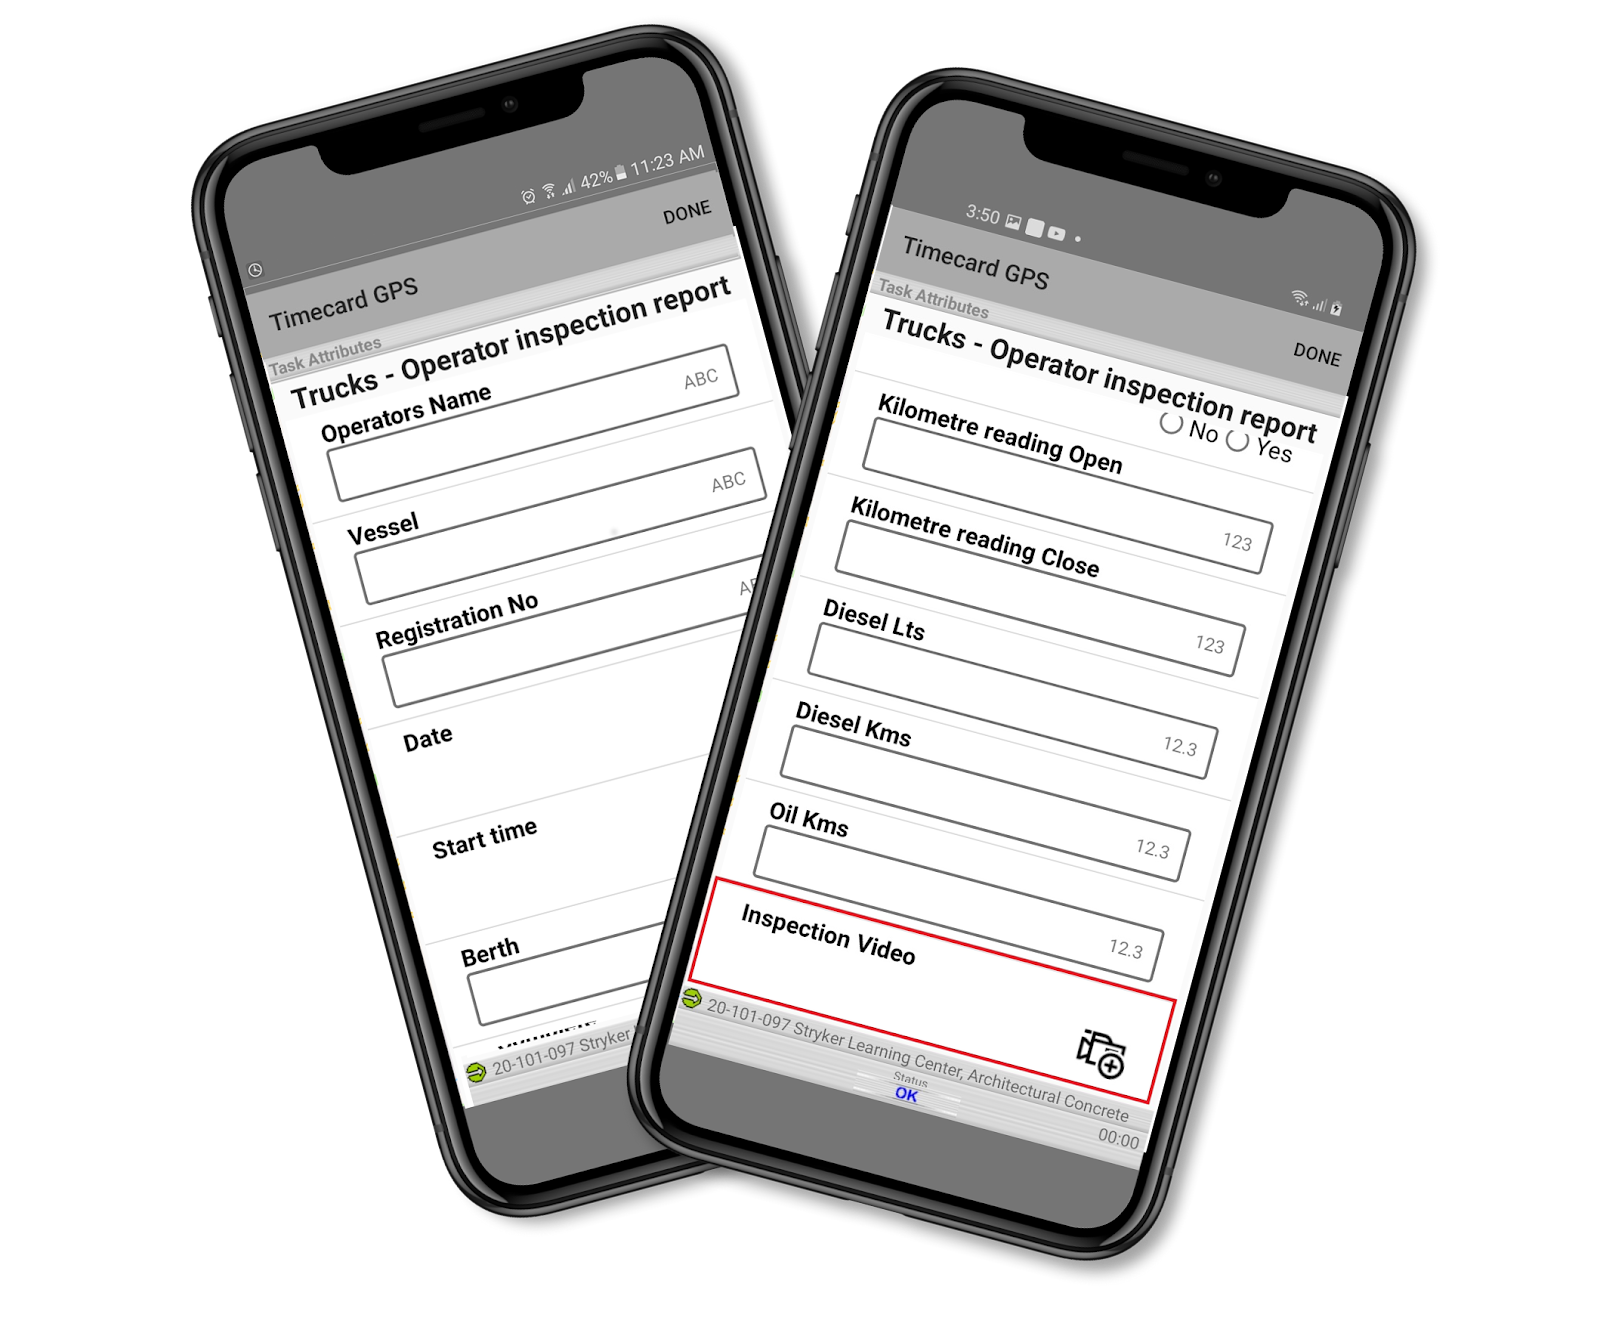
This feature gives the field user the capability to take a 30-second video inside a form to document customer visits or important things happening on the field.


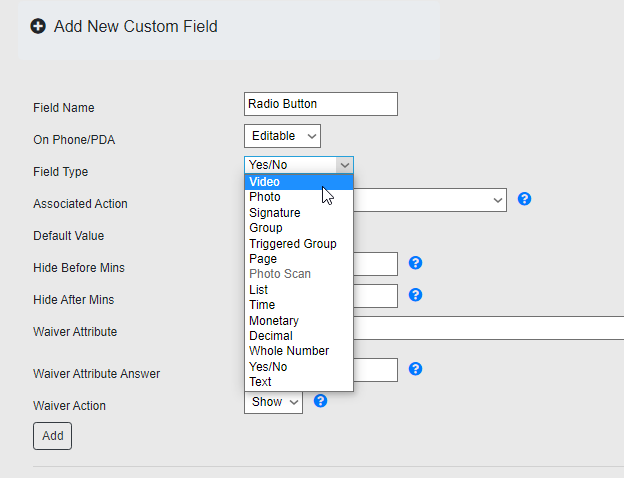
To create a Video Custom Field, the steps are the exact same as described in the previous point, that is, going to the "Manage Custom Fields/Forms" section and adding a new field in a form. In this case, make sure to select the Field Type called "Video" and click on "Add" once you are ready:


That's it for now! We hope you take advantage of these incredible new features, be on the lookout for new things that will be coming up.


--Econz Team 


Wednesday, April 3, 2019

New Feature: Pre-Naming Photos

With this new feature, you will be able to save your employees' time by having them only take pictures and the system will name them automatically.

The default way is that you take a picture, tap on "Submit" and then you are asked to enter a "Picture Description":


To enable the system to pre-name images captured with Timecard GPS, you need to go to the "Manage Custom Fields/Forms" in the Administration tab. This will work for any Custom Fields that you add, be it Default or Custom Forms.

On this example, we are adding a Default Custom Field (using the "Photo" Field Type, of course) called "Street View". Notice that we are using "Street View" as the Default Value:


Whatever text you put into this Default Value, will be used to name the pictures captured using this specific custom field. Click on Add to create this new field.

Now we are ready to test this with our device, we can go to the "Add Task Info" section and our Street View photo field will be there:


We can then take the picture and when we tap on "Submit", the "Picture Description" prompt will be skipped, so you will see the list of pictures you have taken. Tap "ADD" to capture more images, or "DONE" if you have what you need:


Now we can compare the results, if we checked on the Custom Report, we can see our "photo1.jpg", since we didn't enter a name in that case, and right below it, there's our "photo1-Street View.jpg":


Notice how it used the automatic name without us entering anything!

A new section we recently added in the Administration tab called "View User Photos" will also show us how the files were named (watch out for an upcoming post about this new great feature):

(Click on the image to enlarge)

We hope you like this cool new feature, leave us any comment or question down below!


--Econz Team

Wednesday, February 13, 2019

Update to Custom Fields: Hidden Fields and Making Them Editable

On this post we are going to talk about a new feature that we just implemented: the ability to add Hidden Custom Fields.

Why would you want to hide Custom Fields from the mobile device? Well, this feature goes very well together with adding Custom Fields to the Edit User Events section, so there might be some additional codes or notes that only Managers need to add, so to avoid employees from seeing unnecessary fields, you can use this functionality as follows:

Go to "Manage Custom Fields/Forms" in the Administration tab:


Then select "Edit Default Custom Fields":


In this example, we already have a couple of fields that employees can see:


Let's go ahead and add a new hidden field, this will be called "Eligible for Premium Pay" and we will set it up as "Hidden" using the "On Phone/PDA" dropdown menu. Once you are happy, click on the "Add" button:

So here we have our three custom fields, two are editable from the mobile app, and one is hidden:


Let's go ahead and make this field available so a Manager or Admin can edit it. Go to the "Event Edit Settings" in the Administration tab:


Then use the dropdown menu to add the desired field (Note that at the moment the supported fields are the "Yes/No" and "List" types). You will be able to add not just hidden but editable or required fields, as well, depending on your needs. For this guide, we will use our new hidden field, so we click on Add:


Once that is done, next time you go to edit a user's timesheets, you will be able to click on this button, which will show you the custom fields that are available for editing:


After adjusting the values of the fields as necessary and clicking on Save, the changes will be reflected immediately on any report dedicated to custom fields, such as the Custom Report or the Custom Field Report:

Leave us any comment or question, we hope you get the best out of this new enhancement!

--Econz Team


Friday, December 11, 2020

Econz Timecard Forms Only Feature

We are excited to announce a new feature called "Forms Only App Version". This version of our Timecard GPS application is intended for customers that are looking to have their field staff to only capture Form data, instead of timesheet information.


The Forms Only Version is ideal for any type of digital transformation collection, as shown in the following example of our Covid-19 form:


This feature includes Pictures, Videos, Text, Yes/No Questions, Signature Capture, List Selection, Decimals, Whole Numbers and even Monetary Values, among a variety of custom fields that you can add to the forms in order to collect the right data to make important business decisions.


To enable this functionality, all you need to do is follow the usual steps when creating a Field Worker, that is, going to the Field Workers tab and in this case, selecting "TimeCard Forms Only" as the Device Type. Then you'd enter the Device ID, Name, select "Field Worker" as the User Type, choose the appropriate time zone and set and confirm a Password. Once that is done, click on Add New at the bottom. 


When setting up the device , the interface will be that one of the Forms Only Version, no clock in or out buttons for this one ,you will be able to go straight to the Forms!


If you are interested in this forms-only application version please contact us so we can provide you with more information on how you can implement this for your company.


--Econz Team

Friday, June 5, 2020

COVID-19 Self-Assessment Form/Survey


During these challenging times, Econz Wireless has been assisting our customers with creating their own COVID-19 Self-Assessment Forms/Survey questions and PDF output. The idea behind this is to provide employers the necessary tools to document and keep track of their staff's health, and then take decisions according to the information provided by the field collaborators.

When using the COVID-19 Self-Assessment questions, the forms are set as required to be completed prior to clocking in or starting the shift. Below are a few examples of the type of questions that can be asked to your field employees:


The COVID-19 Self-Assessment features includes: 

  1. Required questions and digital signature to be completed prior to the field employee’s start of their shift.
  2. Real-time alerts when questions require managers/supervisors to be notified.
  3. Custom PDF output with company logo and digital signatures.
  4. Schedule PDF  to be sent to Managers/Supervisors/HR Directors daily, weekly or as needed.


If you wish to learn how this can be setup, make sure to check out our post on creating Custom Forms/Surveys.

Please reach out to our Customer Support Team in case you had any additional questions.

Until next time!


--Econz Team


Friday, September 24, 2021

Editing Custom Fields with Reasons for Changes

Hello everyone! Today's post will be about working with forms and custom fields that employees have already submitted. Just like with entering Tasks and SubTasks, we are all prone to commit mistakes from time to time, so we have come up with a solution to help you fix that and get not only your timesheets but also your forms to be perfect.

The first step is to create reasons for the changes. These will be added to the same place where you add reasons for editing tasks, and that's the "Manage Edit Event Reasons" setting in the Staff section, within the Administration tab:


Here are the current reasons we have, as you can see, they are intended to be used for editing tasks, so let's go ahead and add a couple new ones to be used with custom fields! First we clock the "Add New" button:


Then we enter the description for this reason and click on "Add New" again:


Here are the two new reasons we have added, make sure to use the ones that make sense to your business:


One of our employees has fill out a form we created called Accommodation Expenses:


When we generated the "Custom Field Report" we noticed that there were some mistakes done. For example, for this particular trip there was no food allowance, as everything was charged through the hotel bill. Also, this form was filled before there was the need for him to stay one additional night, so we also have to change that:

Click on the image to enlarge

For that we click the "Edit" button on the right side of the screen, any would do as it will open the form that we are working on:


First we want to uncheck the "Food Allowance" field. We created a reason for the Yes/No fields, so that's the one we are using in the Reason dropdown menu:


After clicking on "Save" we can generate the report again and the field value will have changed to "No":


Then, we want to reflect what we mentioned earlier so that the meal charges are included in the hotel expenses and raise it to one more night, so we adjust the "Total Amount for Meals" value to zero, edit the total nights to 2 and then change the "Total Amount for Hotel" to $200. For these ones, we want to use the "Editing Custom Field Value" reason and then click on "Save":


When we generate the report, we can confirm that all the values have been changed successfully:


Finally, we can use the "Timecard Audit Report" to review the changes that we just made! Notice how the reasons are used and make sense to the changes we performed, and how we can see both the original and edited values:

Click on image to enlarge

With that being said, we conclude this post! Let us know in case you have any questions or comments down below.


--Econz Team

Monday, March 7, 2022

Weather Widgets for PDF Forms

Hello again! Continuing with the wonderful previous post, we have an additional feature that can be incorporated into the useful PDF forms.

As a quick overview, remember that with Timecard GPS you are able to capture additional fields other than tasks and subtasks, which we call Custom Fields and Forms. You have the option to select from a number of different types of fields that are to be added to these forms, which in turn, can be used to capture information that is later found on a number of reports, as well as the aforementioned Job Confirmation PDFs and well, PDF forms in general!

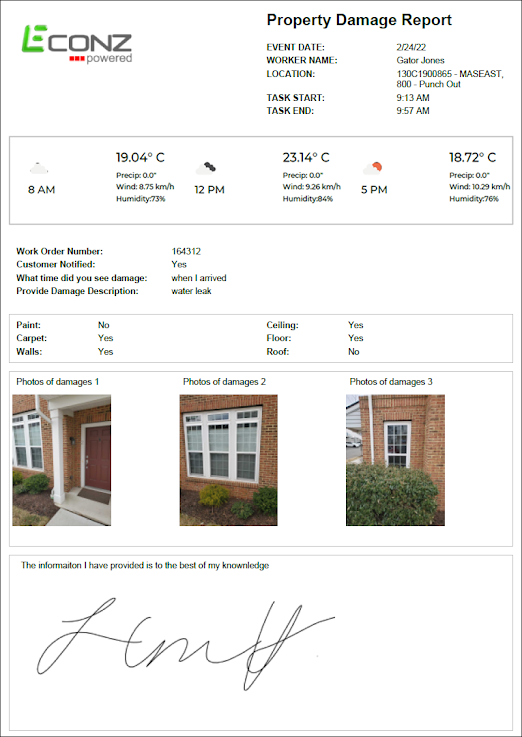
Added to these, we recently included the capability to embed a convenient and pleasing weather widget within the PDF form, which if this is a feature you are interested in, our Support Team will be able to add to your PDF form output.

Here is an example of a real PDF form showing what it would look like:

Click on the image to enlarge


Let us know if this is something you would like to include in your forms and we'll take care of it for you!

Until next time...


--Econz Team


Thursday, October 29, 2020

Dynamic Table Feature included on Forms

We are very proud to announce a wonderful new feature that gives our application an edge over the competition, we call it Dynamic Table on Forms.

Our Dynamic Table feature now enables a field worker to access additional information when completing a custom form/survey on a mobile device.

This new feature was created to allow field workers access to extra database information that can be loaded into the Timecard system’s form, directly as a CSV File.

To explain better how it works, take a look at the following table: 

The employee would select the "Order ID", then the application would fill out the rest of the fields automatically. This is particularly useful if you have a set of inventory items with predefined values or parameters and you don't need your staff to enter everything manually all the time. The dynamic table can provide information such as available products in the warehouse with codes and descriptions, a List of Work Orders with customer names, address, phone numbers, etc.

In this example, selecting any of the Order IDs would also grab the information for Name, Price, Quantity and Total, and show them as their own custom fields in any of the Custom Field Reports.  

This was designed not only to show the information back to the workers but also to use it as a selection and show this in our reports information.

Setting it up is very easy, just follow the usual Custom Field steps and select the Field Type called "Dynamic Table". Here is where you can click on "Browse" and upload the CSV file. Click on "Read Table" and then you can save the new field.


We made sure to make this into a convenient way to show and retrieve important information that is key for your business, we hope you take full advantage of this great feature that is included in our Timecard GPS package.


--Econz Team